Since regular juice cleansing/fasting is now part of my life, my latest experiment was to see if I could replicate a five-day BluePrint Cleanse on my own. It was a resounding success. I will show you step-by-step how I planned it and how I made the juices.
Background
I got the idea to do my own juice cleanse when it was about time for me to order the next round of juices from BluePrint. I try to do a three or five day juice cleanse every 30 to 40 days. A three-day BluePrint Cleanse isn’t cheap: $195 if you live in New York or LA where they deliver for free; add $10-20 for shipping if you live elsewhere.
I was already juicing twice a day, producing around 50 ounces of juice per juicing. That came out to about 100 ounces or six 16-ounce glasses of juice per day, of which my husband would drink two and I would drink four. Our morning juice would be green, afternoon juice would be red.
That got me thinking: the BluePrint Excavation cleanse is four 16-ounce bottles of green juice per day, plus a spicy lemonade and cashew milk. All I would have to do is switch out the afternoon red juice for more green juice, and figure out how to make the lemonade and cashew milk.
Preparation
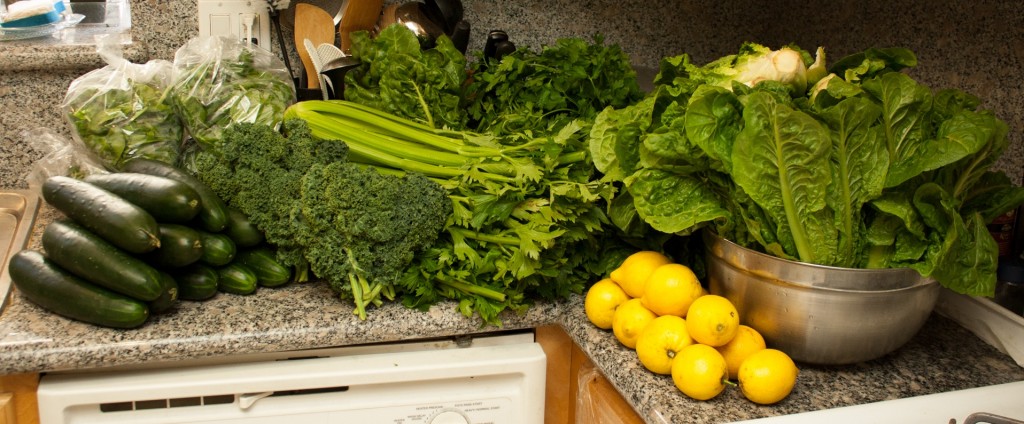
I decided to cleanse from Monday to Friday. I bought all the fresh produce the weekend before. The following is a complete list of what I used. All produce was organic or sustainable/pesticide-free, from the farmers market, Whole Foods, Trader Joe’s, or similar market.
10 heads of romaine lettuce
12 cucumbers
5 heads of celery
5 six-ounce bags of baby spinach
2 bunches of kale
2 bunches of parsley
1 bunch of swiss chard
23 lemons
30 granny smith apples
1 lb ginger root
2 sixteen-ounce bags of organic raw cashews*
organic clear raw agave syrup
organic vanilla extract
cinnamon
nutmeg
Other useful items:
food scale*
salad spinner
veggie brush
gallon ziplock bags
paper towels
BPA-free storage containers*
BPA-free juice jugs*
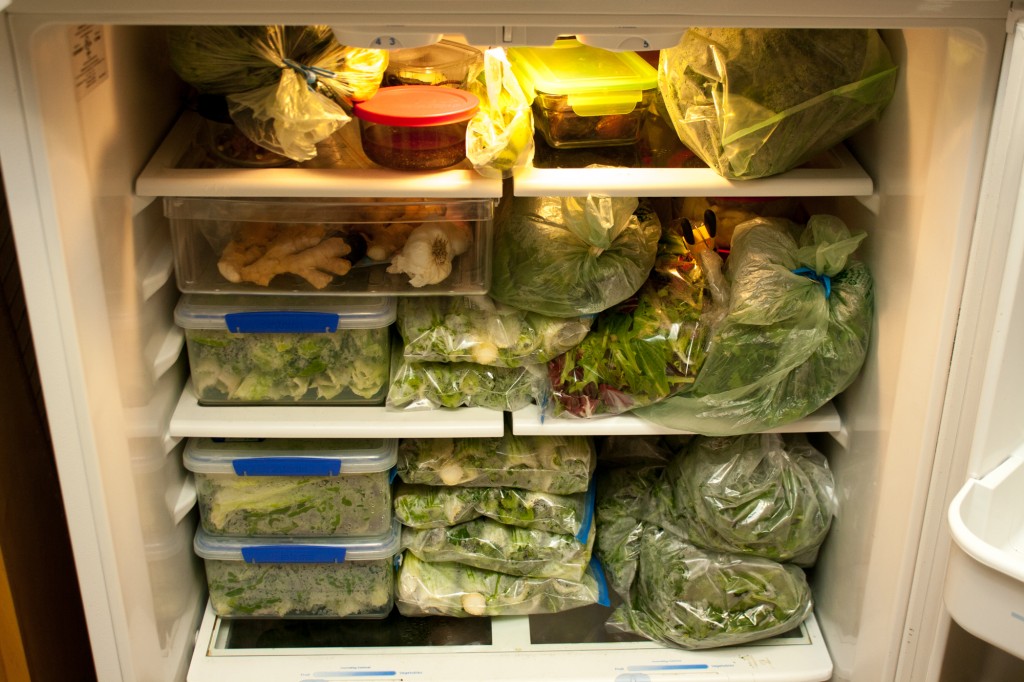
I recommend washing green leafy veggies ahead of time (except baby spinach) and storing them in ziplock bags or BPA-free storage containers* with a paper towel folded inside to absorb excess moisture. The veggies will last longer, and it seriously cuts down on the prep time before each juicing.
*affiliate links
My Fridge before the Five-Day Cleanse:
Order of Juices
The order is modeled after BluePrint Excavation Cleanse. Recipes to come!
# 1: Green
# 2: Green
# 3: Green
# 4: Lemon
# 5: Green
# 6: Cashew Milk
Cost Comparison
Just like BluePrint Cleanse, I put 6 pounds of produce into each green juice – except instead of yielding only 16 ounces, I was getting about 48 ounces. I would drink 16 ounces right away, save 16 ounces for later, and give 16 ounces to my husband. The green juice is relatively more expensive than the lemon and cashew milk, but even then it comes out to about one fourth of the cost of a bottle of BluePrint Cleanse. Plus, the homemade version is a bright vibrant shade of green unlike the olive green of BluePrint Green.
That may sound like a great savings, except for the time investment. If you believe time is money (and most of us do), you might not want to spend the time required for a DIY juice cleanse. This is particularly true if you have not already mastered produce shopping, washing/shopping/prepping, storage, and the juicing itself. I would say it took at least two hours per day making all the juices and cleaning up. This is not counting the four hours of veggie washing.
So, Is It Worth It?
A DIY juice cleanse is definitely worth doing at least once. Even though it is a hefty time investment, the kitchen skills and confidence you pick up are well worth it. Having to consume juices on a schedule forces you to plan ahead and be somewhat disciplined and organized. And of course, there are the health benefits.
If you’ve never done a detox of any kind, I would suggest picking up a bottle of BluePrint Green at Whole Foods for $9.99 and making sure you can tolerate the taste. My green juice recipe is a fresher tasting and less sweet version of BluePrint Green. Then, if it fits in your budget, try a three-day juice cleanse from a company that uses organic produce.


This would have been helpful before I made my trip to Whole Foods today. Where did you get a veggie brush?
I got the one at Target for around $2. I figure it needs to be replaced regularly so I didn’t want to spend too much. Yay, Whole Foods! I think we’re gonna invest in some of their stock. 😉
Looking forward to reading more about your juicing and recipes!
Hey, girl! Thanks for stopping by. Hope all is well.
Nice photos!
Thanks! I have nicer ones coming up, hehe…
This is very helpful! I just started juicing along with my coworkers:)
Thanks, Bonnie! Let me know how that goes. What kind of juicer are you using?
I’m using a Breville Juice Fountain. Is that a good one?
It’s not bad, but if you get serious about juicing leafy greens, I recommend investing in a masticating slow juicer like the Omega J8004 or a press-gear juicer like the Green Star Elite. Breville centrifugal juicers will yield about 20-30% less juice overall.
What about using a Vitamix?
You could use a Vitamix or other blender, but you’d have to strain the juice out of the mixture with a fine mesh strainer or cheesecloth. The problem with drinking it straight from the blender is that it contains too much fiber, which triggers digestion. There’s nothing wrong with eating fiber, of course, but it depends on what you are trying to accomplish. If your goal is detox, you want pure juice with as little pulp as possible so it can bypass digestion and be absorbed directly into your bloodstream. If your goal is to use the smoothie as a meal replacement, then you’d want to keep all the fiber in it. Once you understand the pros and cons of juicing vs. blending, you can decide which “mode” you want at any given time. Unfortunately, as great as a Vitamix is for making smoothies, I don’t think there’s a good substitute for a proper juicer in the long run.